- Make ID cards:
- NEW! ID Maker
- First time printing?
- Resources
-
New customer?
Create Account
Free shipping over $19
Free shipping over $19
Products
Help
Make Cards
Account
ID Learning Center: How To Make ID - Basic Tutorial - 1-Up Sheets
Basic Tutorial - Video
What You'll Need
- 1-Up Perforated Teslin® Paper
- Butterfly Pouches
- An inkjet or laser printer
- Hot Laminator
- Lamination Carrier
- A Graphics Editing Program (Microsoft Word, Apple Pages, GIMP (Free), Adobe Photoshop, Adobe Illustrator, Corel Draw, Etc.)
We have created an Example ID and 1-Up layout template which you are free to use and modify for your own personal use. You can download them from the ID Template Downloads section of the Learning Center. We will be using this Example ID and Layout template during the tutorial for reference.
Steps

1. First you will want to print out your ID (Printer Settings).
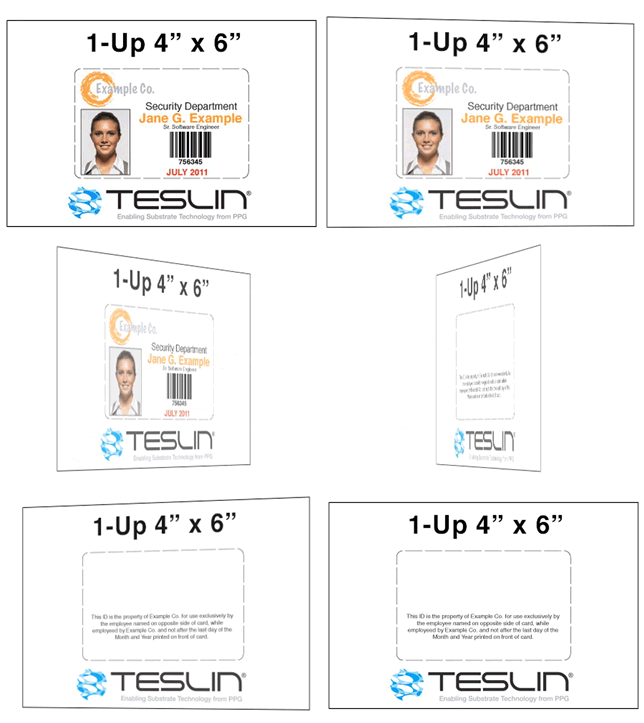
Printing on our 1-Up sheets couldn't be any easier. The animated image above shows the 1-Up sheet with both the front and back printed.
2. Next you simply need to punch the ID card out of the perforated Teslin® sheet.
Because 1-Up sheets don't have to be subjected to as much abuse as 8-Up sheets the ID card should pop out of the sheet with ease. Now would be a good time to turn your laminator on to allow it to heat up.

3. Put the Teslin® inside the pouch and laminate it.
Align the Teslin® insert inside the butterfly pouch and close it. Hold the Teslin® insert in place in the pouch and place this inside the carrier (if your laminator requires one) and once again hold everything in place. If your laminator has a "run" switch, turn that on to start the feed wheels turning. Now, feed the the carrier/pouch in to the laminator, folded side first. Let the laminator take it in and wait for it to come out the other side.
Congratulations, you've made your first ID card!
Sounds great, right?
You can buy an ID Kit today and have it in 3 days (or less) with our standard Priority Mail shipping! And don't forget out unconditional 30-day money back guarantee!
 Teslin Paper, Butterfly Pouches, Inkjet PVC Cards, Make ID Card Kits Easy

